Modes M, S1, and S2 on a flash may sound a bit cryptic and can be confusing. Here is what they mean…
- M = Manual trigger mode.
This is for camera-mounted speedlites or for when you’re using remote speedlites with radio triggers. This is the most basic flash triggering available. The camera will trigger the speedlite via the hot shoe and it will immediately fire. Alternatively, a hot shoe mounted radio trigger can transfer the camera’s trigger signal to a remote-mounted speedlite and it will immediately fire.
In M mode, the speedlite trigger signal comes directly from the camera. - S1 = Slave 1 trigger mode.
This is used to remotely trigger manual speedlites. The speedlite will be optically triggered on the first flash from the on-camera speedlite. The remote speedlite will see the flash from the main system speedlite and immediately trigger itself. There could be multiple remote speedlites, all triggered at the same time.
In S1 mode the speedlite trigger signal is derived from the first flash from the main speedlite. - S2 = Slave 2 trigger mode.
This is used when you are mixing automatic and manual speedlites. Automatic flash systems send two flashes where only the second flash is used for taking the photo. In S2 Mode, the manual speedlite will ignore the first flash and trigger on the second flash. If your lighting system is using a mixture of TTL and Manual speedlites, switch to S2 mode on the manual flash units.
In S2 mode the speedlite trigger is derived from the second flash from the main speedlite

Wireless, Optical and Radio triggers explained
I used to think I understood what Wireless and Radio meant, until I started working with speedlites. I am ‘of a certain age’ so to me ‘wireless’ and ‘radio’ are the same. So when a speedlite manual says it has wireless triggering I expected a radio trigger, but this is not always so.
After reading a few manuals very carefully, this is my understanding now…
Optical triggering has a short range, so if the manual mentions wireless triggering but suggests there must be line-of-sight for the speedlites to trigger or the maximum range is about 15m or so, then it’s discussing optical triggering. If they say the trigger range is about 100m then this will be radio triggering.
Radio triggering allows for multiple channels, so if the manual discusses channels and says you must set all speedlites to the same channel, then this is radio triggering. If there is no mention of channels, it is optical triggering.
M, S1, S2 Modes as Explained by Yongnuo
If You Only Have The Yongnuo Manual, How is This Explained?
Here is the relevant extract from the Yongnuo YN460ii manual that describes the S1 and S2 modes. I selected the YN460ii for this example because it is a very basic flash model. Later models have more modes and this just makes things more confusing.
I like Yongnuo equipment, but their manuals leave a lot to be desired. They are sufficiently confusing that even when they give an explanation, that explanation needs to be explained. So let’s try it…

Pressing the MODE button will allow the flash to cycle through the modes M(anual), S(lave)1, S(lave)2.
M(anual) – The flash trigger through the camera trigger signal via the hot shoe.
S(lave)1 – Flash triggers on the first flash – similar to when you’d use a radio flash. Use this only in manual mode.
S(lave)2 – Similar to S1 mode but is for use in TTL flash systems. If you try S1 mode and it’s not working, then try S2 mode.
But this still doesn’t tell the whole story. Let’s look into optical triggering in more detail.
What is Optical Triggering?
The first thing to understand about S1 and S2 modes in a flashgun is that they only function when you are using optical flash triggering.
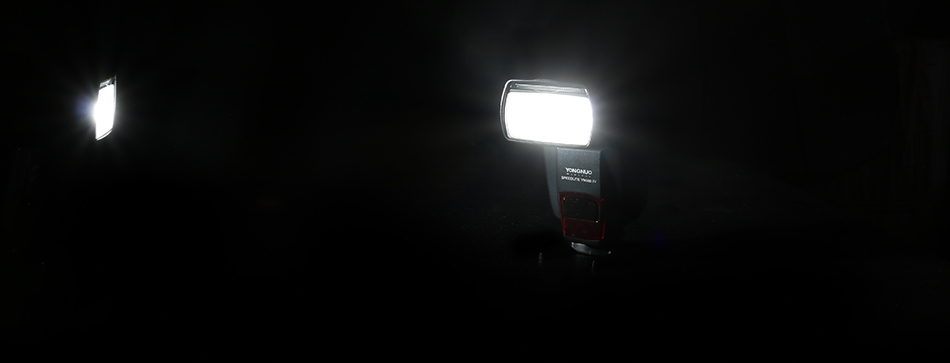
The red plastic cover on the front of the flash unit is an Infra-Red filter. Its job is to block the visible light and allow only IR light to get through. Inside this cover is a light sensor – the optical trigger. It is watching for a flash of light – from another flash unit. It doesn’t react to normal lighting – even if that normal lighting is changing all the time. It is only looking for sudden large, sudden changes in light – that would indicate a flash has been triggered.
Flash M Mode explained
This is the most basic mode in your camera/flash system. When the shutter button is pressed, the camera will wait for a few milliseconds, to give the shutter time to open fully, before triggering the speedlite. The exact wait-time is dependent on the camera and is irrelevant from a photography point of view. Suffice to say the camera will trigger the speedlite when it is ready, and you will not notice any delay.
When you fit a radio trigger like the RF603 then from the point of view of this discussion, the camera assumes the speedlite is still directly connected to the camera.
Flash S1 Mode explained
In Slave Mode the optical sensor in the speedlite will watch for another speedlite to fire. When the sensor sees this signal, it will immediately trigger the speedlite. In this way you can add as many external speedlites as you like and they will all be triggered from the main system flash.
The normal way to use this system is to use the camera’s built-in flash or an external camera-mounted speedlite to trigger the other speedlites.
Flash S2 Mode explained
This is a modification of the S1 mode and is used exclusively for automatic flash systems. In these systems the flash will trigger twice. The first flash – the pre-flash – allows the camera to check light levels and to adjust exposure and speedlite power for proper lighting in the scene. This pre-flash is ignored by the speedlite in S2 mode. It is only when the flash fires for the second time – immediately after the first flash – that the S2-mode speedlite will trigger too.
Disadvantages of S1 and S2 Modes
S1 mode and S2 mode are used with optical triggering. This brings its own issues for lighting setups:
- Optical sensor is ‘swamped’ by ambient light
The optical sensor will monitor the light levels in the scene but will only trigger the speedlite when it sees a large and rapid increase in the light level. As such, it has to ignore the normal light levels in a scene, whether you are shooting on a sunny day or during the darkest night.
But it is possible for the optical sensor to be swamped by the ambient light. Using random numbers, let’s assume the sensor has a range of 0 to 10 and, because the sensors is pointing to the sun, the trigger level is set to 9.5 or 9.8. The speedlite trigger will send this level to 10. This is only a small signal and may not be enough to trigger the speedlite. If you turn the flash away from the sun the trigger level may now be 3 or 5 etc. Now, when the speedlite triggers, the signal is much larger and the speedlite will fire.
On more than one occasion I have had to move a speedlite out of the direct sun in order to ensure the sensor would work properly. - All Speedlites in the setup must see the light from other speedlites
In order to work properly, the speedlite sensor must see the main flash – either directly or by reflection. This means when you set up your lights you must ensure the speedlites all see each other. This can mean compromises are necessary. What if you have a speedlite set up to shoot into a softbox and the speedlite sensor is hidden behind the softbox itself. This arrangement will not work.
I had set up a portrait once, where the wall behind the subject was lit from ground level. Unfortunately, this speedlite couldn’t see any light from the other speedlites in the setup. In the end, I set another speedlite that would fire from the main lights and send a ‘snooted’ light to the background speedlite. - Reduced range because the trigger light is too far away from the main flash.
This has never been a problem for my in the studio, where distances are limited, but when taking an outdoor shot I have found issues when trying to trigger a more distant speedlite. Optical triggers usually have a useable range of up to about 15m (45ft) or so.
Why I never Use S1 or S2 Mode
Optical triggering needs line-of-sight to work properly. The slave must be able to see the main flash unit so it can see it trigger. And herein lies the weakness of the system.
Optical Triggering – What Could Possibly Go Wrong?
- If you are outside on a sunny day, optical triggering won’t be very reliable as the bright sunshine can overload the sensor so when the main flash or pop-up flash triggers, the sensor cannot see this increase in brightness.
- Let’s say you are doing studio portraiture and have a flash behind your model pointing to the backdrop. This is a common setup. Well, the optical trigger won’t work. This flash cannot see any other flash in the setup. It would require that you set up another flash that can see the main flash and then your backdrop flash can see this additional flash.
- Let’s say a car went past at night and the lights hit the optical sensor – one trigger. Surely that would mean when the flash sees a pre-flash it would count that as the second flash and trigger the flashgun. Well, no – the pre-flash and main flash triggers must occur within a fraction of a second of each other. This is the system’s way of determining valid trigger signals.
- I use softboxes often. Can the flash still trigger if it is set inside a softbox? Maybe. Occasionally.
- Let’s say I bounce the main flash off a wall and have a slave unit with its sensor pointed to this wall. Will that work? Maybe. Occasionally.
- Or you have a Rembrandt lighting setup with a heavily snooted hair light behind your model. Will that work? Maybe. Occasionally.
- What if I have a model in a room and want an open door with light from a flash unit streaming in from the hallway. Will that work? No.
After I hit these kinds of issues a few times, I vowed never to use optical triggering again – so I invested in a set of radio triggers and haven’t looked back.
Use optical triggering as your last resort
Optical triggering is ok, but it’s far from perfect. It is useful to know as a last resort, but considering the low cost and high reliability of radio triggers, I never use it if I have a choice.
Radio triggers also help simplify the speedlites, as you can ignore the S1, and S2 modes and just leave them permanently on M mode.
Lessons Learned From Previous Photo Shoots
I always look back on photo shoots to see what went well so that I can continue to do that – and what went wrong, so I can make changes. My lessons from a shoot where I used optical triggering are…
- Never trust optical triggering.
Even when I could get the triggering to work, it was a bit flaky depending on how I arranged all the lights. After setting the lights exactly where I wanted them, I had to move them slightly to get them to trigger properly. I even tried setting up small mirrors to bounce light into the flash sensors. - Never use optical triggering.
I’m glad now that I went through my optical trigger phase (it didn’t last long!). As a result, I always use radio triggering now. But there could come a time when the radio triggers fail me, or I forget to bring them, or there’s a zombie apocalypse, etc. In that event I know how I can get by with optical triggering.